If there’s something common in every CAD-program, then it is the fact that there’s at least a dozen spoon tutorials available for each and every one of them. Weirdly, most of these tutorials are way to complicated for such a simple part. In the next few minutes, you will learn how to create a spoon in (probably) the simplest way possible.
Before you even think about starting up our computer, go to your kitchen drawer and get a spoon. If for some reason you don’t have a spoon lying around, don’t worry. There are a few pictures further down below 🙂
Now let’s
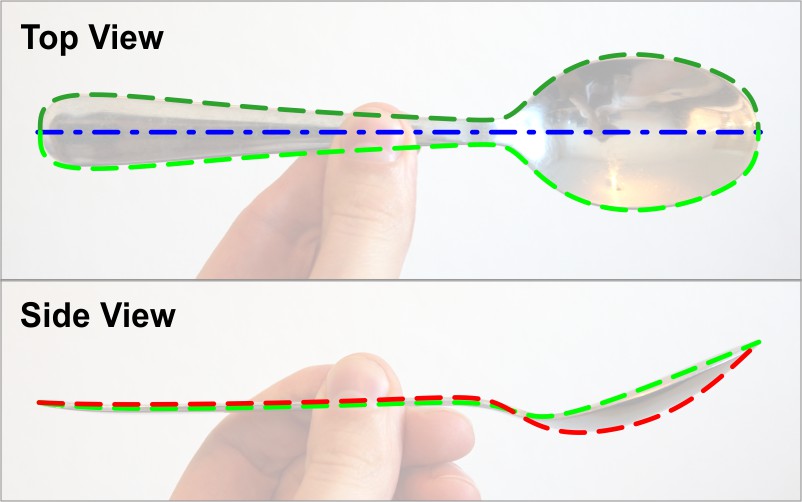
analyze that spoon in-depth. As you can see, the shape of a spoon can basically
be defined by 3 lines (2 of which are symmetrical!). And those 3 lines are all
we need to build this ominous soup-eating-device.
After we have done that, the most important part of this tutorial is already done.
After all, a few minutes of carefully analyzing a part can save you hours of
CAD-work. This is also the part, which many tutors and YouTube-creators seem to
completely ignore.
Finally, it’s time to start Viacad or SharkCad (or any other CAD-software, really). Go into Top View and make sure every Snap, except To Plane is activated.
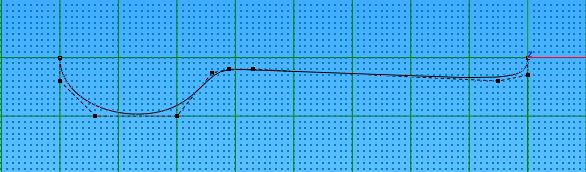
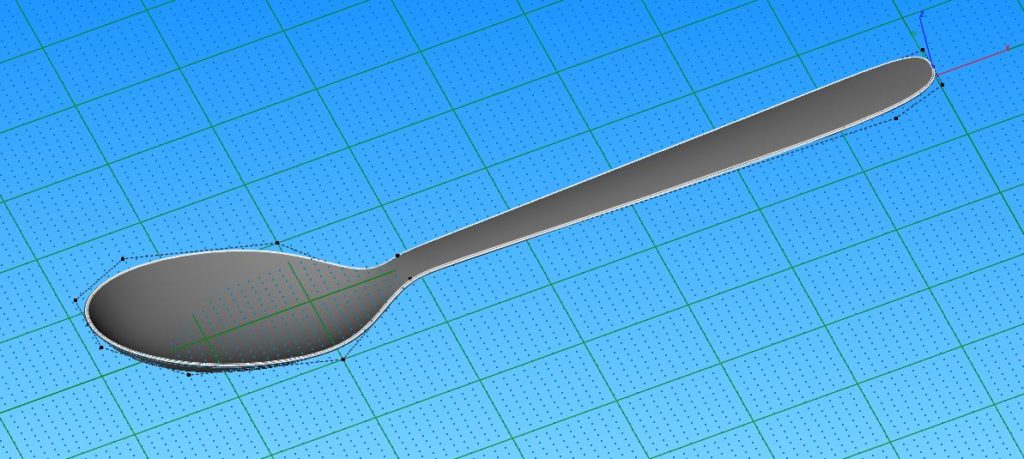
Draw the first curve using the Control Point Spline. Try to draw the curve with as few control points as possible. Around 10 should be enough. As we are mirroring this curve later, you have to align the first 2 control points vertically to the mirror axis. The same is also needed for the last 2 control points. That way, we achieve a tangency between the 2 mirrored curves.
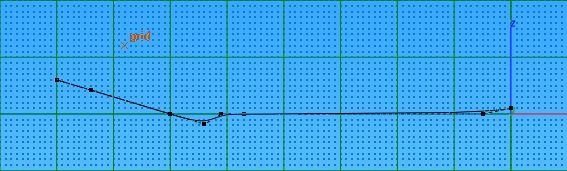
After that, go to the Front View. Switch to Select Deep and move the control points until the curve matches the green line in the front view of the photo above. It’s crucial to only move the points vertically, as moving the points sideways also changes the Top-View contour.
At this point, go to Front- and Isometric View to make sure the whole curve looks as it should. While still in Top View, right click the line and click on Show Points. Count your points and try to remember the number until the next step 🙂
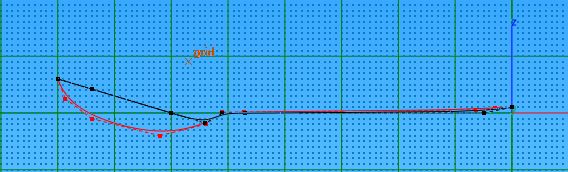
Still remember the number of control points of the first line? Wonderful. Switch to Front View and draw the second line with just as many points. Try to position the points close to their counterparts of the first line. Just don’t forget that at the start and end of the line, there are 2 points on top of each other. This even distribution of control points is necessary to create an absolutely clean and smooth surface. This might be a bit overkill for such a simple object, but it is absolutely necessary if you have to create more complex geometry some time.
For the 3rd line, switch to Top View and mirror the first curve using Linked Mirror.
Now we are finally ready to create a surface and a solid. Click on Skin Surface and select all 3 curves. After that, click on Thicken Solid to add some meat to that surface. Last, but not least smooth the edges of the solid using Blend Edge. If you followed the Tutorial closely, your spoon should more or less look like this:
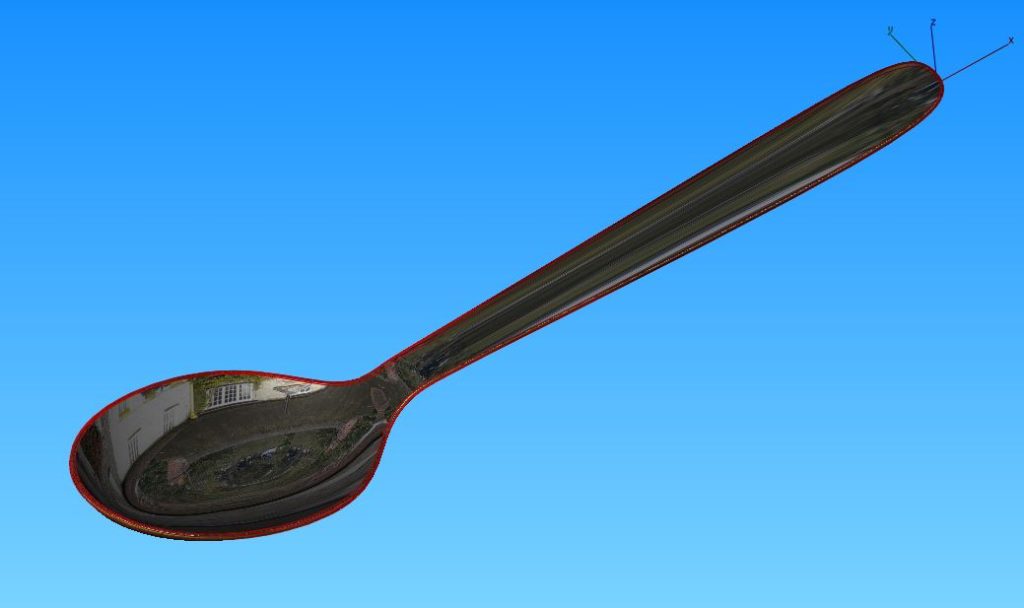
And that is already the end of this tutorial. Enjoy your new CAD-spoon and get yourself some digital soup.